In the realm of off-grid living, camping adventures, or long road trips, a reliable 12V fridge can be a game-changer. These portable refrigerators keep your perishables cool and your beverages refreshing, making them an essential companion for those who seek the great outdoors. However, like any other mechanical component, the compressor in a 12V fridge can face issues over time. To ensure your cooling companion stays in top-notch condition, it’s crucial to know how to test a 12V fridge compressor. In this guide, we’ll walk you through the process step by step.
Before delving into the testing procedure, let’s briefly understand the role of the compressor in a 12V fridge. The compressor is the heart of the cooling system, responsible for circulating refrigerant and maintaining the desired temperature inside the fridge. A malfunctioning compressor can lead to inadequate cooling or complete failure of the appliance.
Tools You’ll Need To Test Your Compressor
Multimeter: A multimeter is a versatile tool that measures voltage, current, and resistance. It’s an indispensable instrument for diagnosing electrical issues.
Screwdrivers: Depending on your fridge’s make and model, you might need a set of screwdrivers to access the compressor and its components.
Insulated Gloves: Safety first! Insulated gloves will protect you from electric shocks while handling electrical components.
Step-by-Step Guide to 12V Compressor Testing
Step 1: Safety Precautions
Before you start testing, ensure the fridge is disconnected from the power source. Unplug it from the 12V socket or disconnect it from the battery to eliminate the risk of electric shock.
Step 2: Access the Compressor
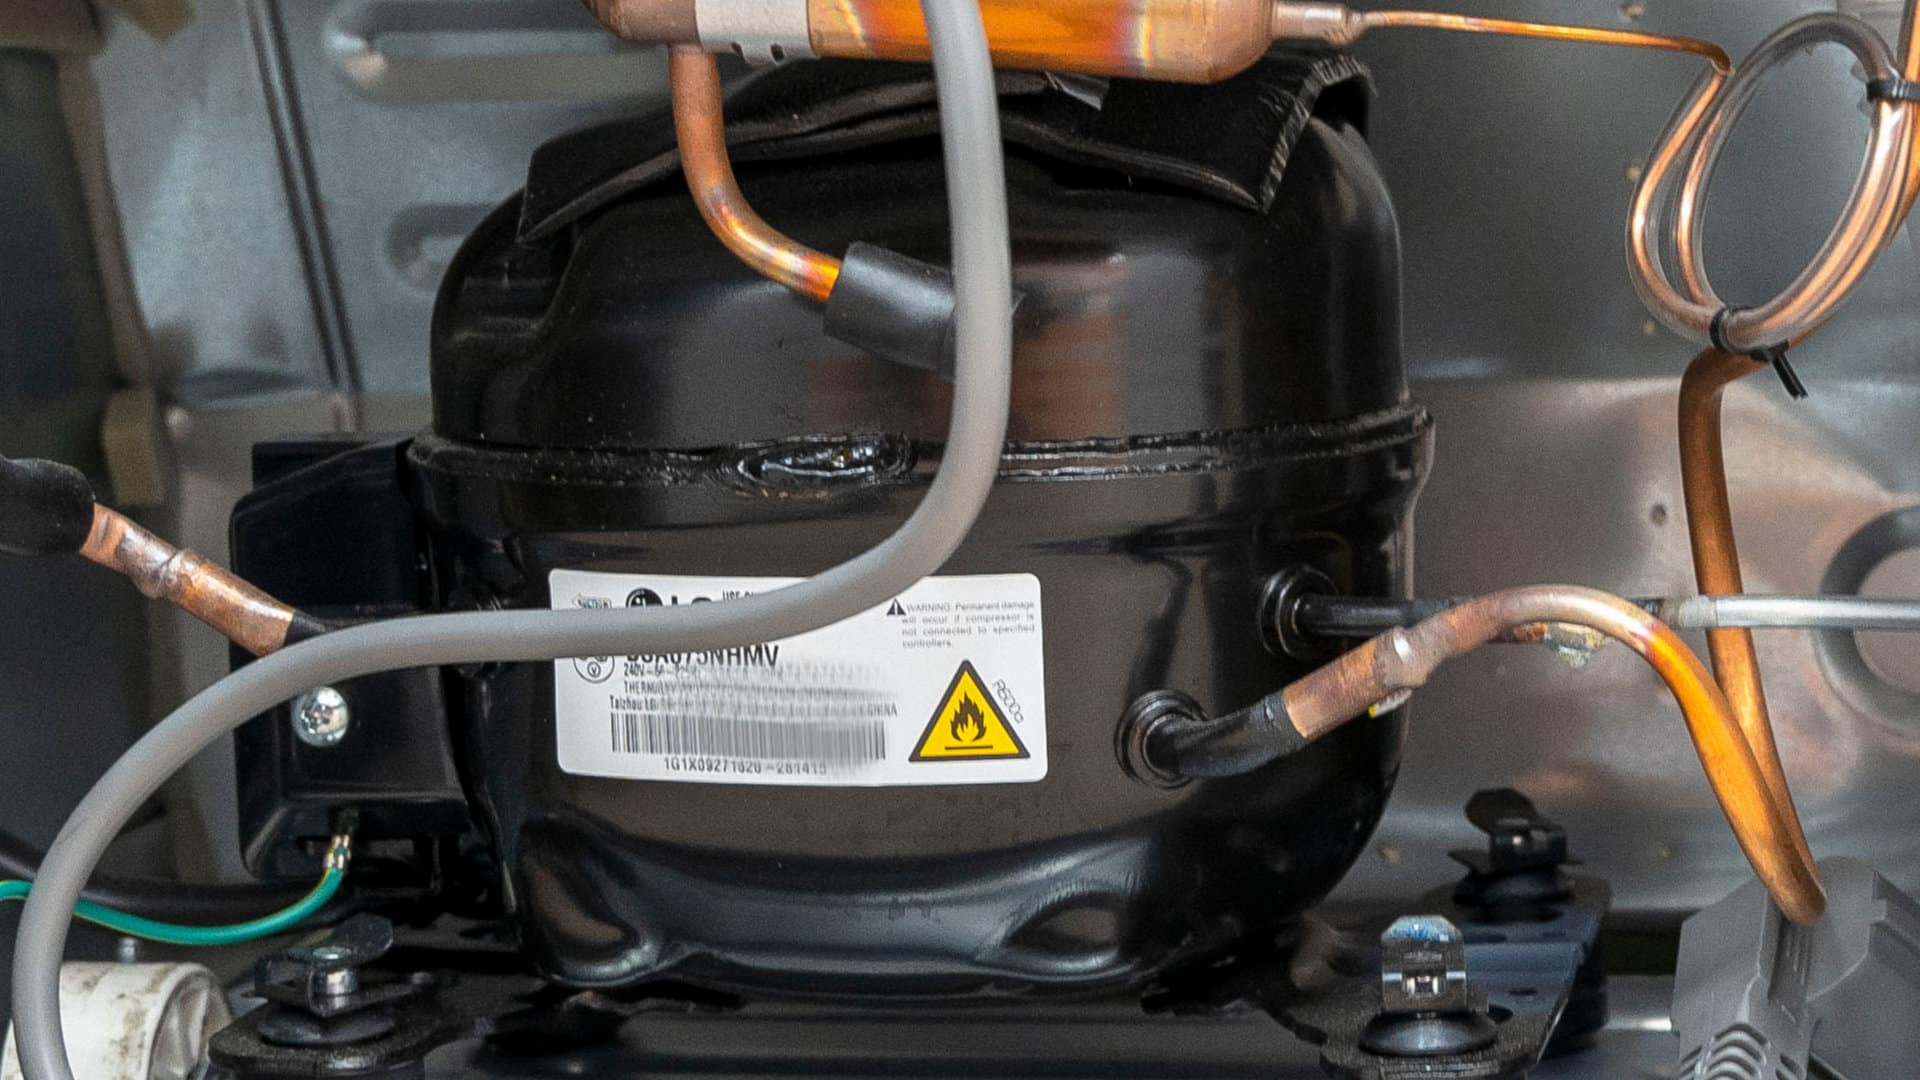
Use your screwdrivers to remove the panels or covers that shield the compressor. Examine the user manual for your specific fridge model to locate the compressor and related components. Compressors are typically located at the back of the fridge.
Step 3: Visual Inspection
Perform a thorough visual inspection of the compressor and its wiring. Look for signs of damage, loose connections, or burnt areas. If you notice any irregularities, they could be indicative of an underlying problem.
Step 4: Resistance Testing
Set your multimeter to the resistance (ohms) setting. Carefully disconnect the wires connected to the compressor terminals. Measure the resistance between the terminals using the multimeter probes. Consult your fridge’s manual for the expected resistance values, as they can vary between different models.
Step 5: Voltage Testing
Switch your multimeter to the voltage setting. Reconnect the wires to the compressor terminals. Plug in or reconnect the fridge to the power source. Turn on the fridge, and using the multimeter, measure the voltage across the compressor terminals. Again, refer to your fridge’s manual for the specified voltage range.
Step 6: Listen for Unusual Sounds
While the fridge is running, listen for any unusual sounds emanating from the compressor. A healthy compressor should produce a steady, low hum. If you hear clanking, rattling, or irregular noises, it could be a sign of internal issues.
Step 7: Check the Compressor Temperature
Carefully touch the compressor after it has been running for a while. Be cautious, as it can become hot during operation. The temperature should be warm but not excessively hot. If the compressor feels extremely hot or doesn’t warm up at all, it may indicate a problem.
Step 8: Monitor Cooling Performance
Observe the cooling performance of the fridge. If the compressor is running, but the fridge fails to cool adequately, there might be a refrigerant issue or a compressor problem. If the compressor isn’t running at all, it could be an electrical or internal fault.
Step 9: Hire a Professional if Necessary
If you’re unable to identify the issue or if the tests reveal a potential problem, it’s advisable to seek the expertise of a professional appliance repair technician. Attempting complex repairs without the necessary skills and knowledge can worsen the situation.
Conclusion
Testing a 12V fridge compressor is a valuable skill for anyone relying on portable refrigeration during their outdoor escapades. Regular maintenance and prompt identification of issues can extend the life of your fridge and ensure it remains a reliable companion on your adventures. By following the steps outlined in this guide, you’ll be equipped to diagnose common compressor problems and take appropriate measures to keep your 12V fridge in optimal working condition. Remember, a well-maintained compressor means cool and refreshing experiences wherever your journeys take you.